Everyone gets sad when summer comes to an end. No more warm evenings that last and last. Kids go back to school. No more summer veggies growing in the garden …… Wait what? This does not have to be true with the trick of growing tomatoes in mason jars.
At the end of summer we can keep growing fresh delicious Tomatoes indoors. It is a lot easier than you might think. There are many options on how to do this… We can bring in cuttings from our existing plants and propagate them or we can start them from seed.
One thing we will need indoors is a window with Sun. Or if that is not possible a grow light will do the trick. Don’t worry it doesn’t have to be a fancy expensive grow light.
Since its already winter at the time of this writing I’ll explain some tips and tricks to grow cherry tomatoes starting from seeds using a large mason jar. The Mason Jar can be substituted for any other good size jar.
Short On Time? Download Article + Bonus Tomato Growing Tips
Thank you!
Article is on the way to your email!
Best Types of Tomatoes to Grow Indoors
You will want to start with tomato plants that grow smaller size tomatoes when selecting the seeds to grow inside in smaller pots. A few good options when considering what to grow are:
- Cherry Tomatoes – small bite size tomatoes that grow fairly quickly and range in size from small gumball size to golf ball size
- Jelly Bean Tomatoes – small grape size yellow and red tomatoes that grow in bundles and are disease and crack resistant.
- Pixie Tomatoes – smaller two to three inch tomatoes that are mild and a little tart – great for salsa.
- Tiny Tim Tomatoes – dwarf size tomatoes that range in size 3/4 inch to 1 inch producing red tomatoes.
- Yellow Pear Tomatoes – small yellow grape size pear shaped tomatoes. Sweet and delicious
All the above are good options that grow well inside and produce smaller tomatoes.
Selecting Container for Indoor Tomatoes
Ok so now we have picked the type we want to grow the next thing we should look at is the container selection.
As I mentioned above for this article we are going to use a Large Mason Jar. For one it looks pretty cool and can be a centerpiece and good topic of conversation when someone comes over and sees small tomatoes growing on your counter out of a Mason Jar. And the second reason I happen to have a large mason jar next to me.
Besides mason jars following the steps below any larger size jar will work.
With a mason jar since there is no drainage you are going to want to add some small stones or pebbles or rocks to the bottom of the jar to allow for water run off. If you over water with the pebbles the water will flow to the bottom and the roots will not rot. And when the soil dries up it will absorb the excess water. It works out perfectly this way.
Container Growing Medium
So with that said you will want to find some pebbles / small rocks / stones or grow stones. You can find these most likely in your yard somewhere or get them online. Once you have these you will want to put them in the bottom of the jar filling it about 1.5 inches to 2 inches.
Now moving on to the soil. You will want to select a nice potting soil. There are many on the market to choose from. When I grow potted plants and veggies I usually choose between a miracle grow, or a Fox Farm variety (Ocean Forest or Happy Frog work great)
Take your soil and pour on top of the pebbles at the top of the jar and gently pack the soil in with your fingers. Compact it but not too tight.
At this time you will want to add some water. About a quarter cup or so so that the soil is damp. You want it wet or damp but never soaked.
Next you will want to put a few holes in the soil about 1/4 inch deep using a pencil or anything that will give you a nice hole to place the seeds in.
And up next, you guessed it – place a couple of seeds in each hole and cover them up with dirt.
Now comes the patience. You will want to place them in a warm area for germination. Maybe on top of the fridge or some place in the kitchen will do.
Tomato Seed Germination / Growth
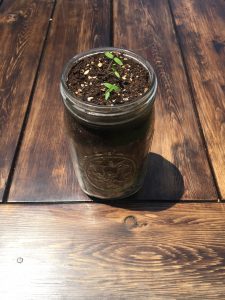
 It will take approximately 5-7 days to see the little sprouts. Once you have some sprouts you will want to continue to keep the soil damp and you will also want to move them into a window that get Sun. Preferably a south or southwest facing window.
They should get about 10 hours of light a day. Whether that is from the sun or a grow light. And as I mentioned earlier the grow light doesnt have to break the bank you can get a decent one on Amazon for about $20.
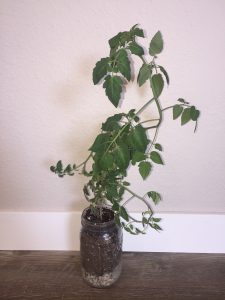
Continue to keep an eye on them to make sure the plant is getting water and in the light. If its in the window getting sun you should rotate it every few days so all parts of the plant get sun.
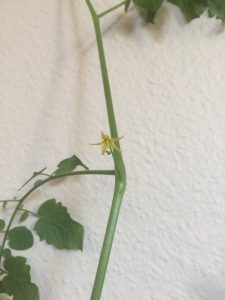
This process will take some time and eventually you will start to see some yellow flowering buds. This means you are onto something and the tomatoes are on their way
Another helpful tip once your tomato plant is flourishing indoors and the small yellow flowers start to bud you may want to help with pollination. 
That being said Tomato buds contain both the female and the male part of the plant so you don’t necessarily have to do anything with the pollen in the absences of Bees or insects.
However you can still help these little guys and speed up the process by blowing a gentle fan on them or lightly tapping the buds. Unless of course you wanted to let nature do its job and bring some bees inside, but probably a better idea not to.
Harvest and Enjoy
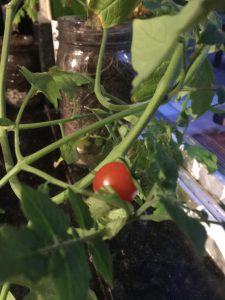
 After the buds form and are pollinated you will be able to finally enjoy your indoor tomatoes. Either eat them directly off the vine or cut them up and eat them with some olive oil, balsamic vinegar and Mozzarella or add them to a salad. Whatever you prefer.
You put in the hard work, patience and time and you deserve to enjoy the tastee home grown organic Tomato.
Steps For Growing Tomatoes In Mason Jars

- Start with selecting the type of tomato you want to grow – select a smaller tomato variety such as cherry, jelly bean, pixie, tiny tim, or yellow pair are good varieties to choose form.
- Select a good container such as a Large Mason Jar or another similar jar.
- Add small stones / pebbles or rocks to bottom of the jar to about 1.5” – 2”
- Select a preferred potting soil (Miracle Grow or Fox Farms) and add soil to the top of the jar.
- Add water to the soil so that it is damp (not soaked)
- Make 1/4” deep holes in the soil and add seeds
- Cover seeds with soil
- Place jar in warm area (on top of the refrigerator or a warm area of your home)
- Move jar In 5-10 days whens seeds start to sprout to a South / Southwest facing window to allow them to get as much sunlight as possible (preferably 10 hours a day – Use a grow light if necessary)
- When you see the yellow buds tap the flowers gently to help with pollination
- Wait for tomatoes to grow
- Eat tomatoes
